Displaying Multi-Column List Boxes
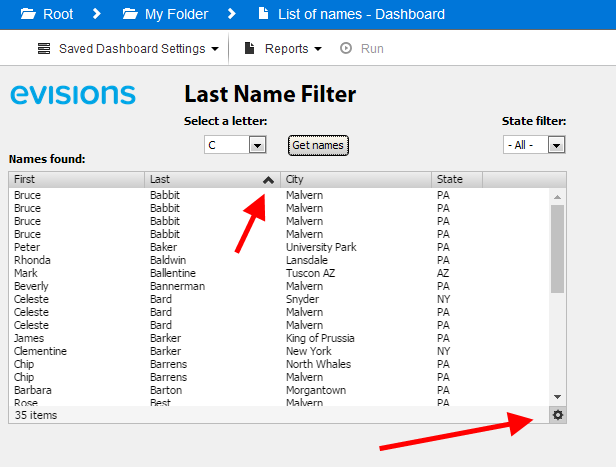
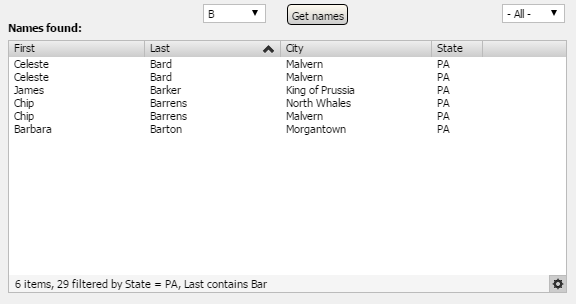
Dashboards frequently use multi-column list boxes to display a set of returned results. In the example below, when you select a letter and click the "Get Names" button the list of users appears below.
Sorting
To sort on a particular column, click the column header. Click the same header again to cycle through unsorted, ascending sort, and descending sort. Click a different column header to sort on that column instead. Sorted columns have an arrow in the header indicating the direction of the sort.
Reordering Columns
Click the gear icon in the lower right of the multi-column list box and go to Order Columns.
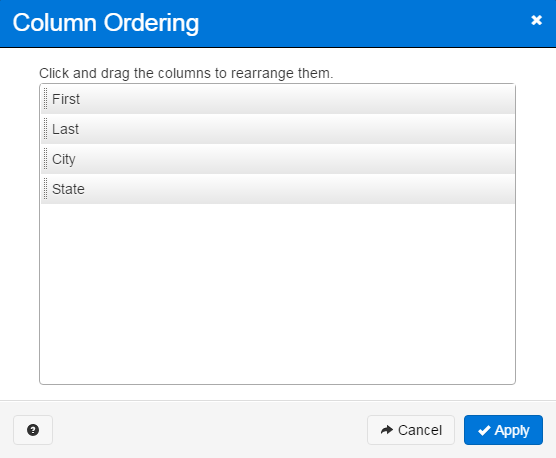
To move a column, drag it to the desired location, then click Apply.
Filtering
You can filter results based on the values in any column. Click the gear icon in the lower right of the multi-column list box and select Filter to open the Filter Options dialog.
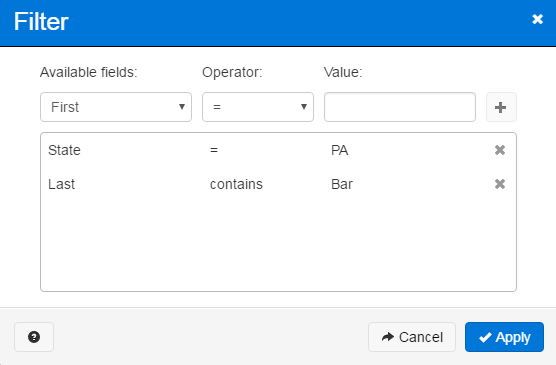
Choose the column that you want to filter on. Then, select an operator (less than, equal to, contains, etc.). Enter the value to filter on and click the plus symbol to add the filter.
You can add as many filters as you need on a column. For example, you might want to filter out all values that are greater than three AND are less than eight. You can also filter on multiple columns. In the example above, the filter will show only people who have the string "Bar" as part of their last name (Bard, Barton, Barlowe, etc.) and live in Pennsylvania. There is an implied AND across all filters.
When finished, click Apply Filters to display the filtered result set.
Exporting to CSV
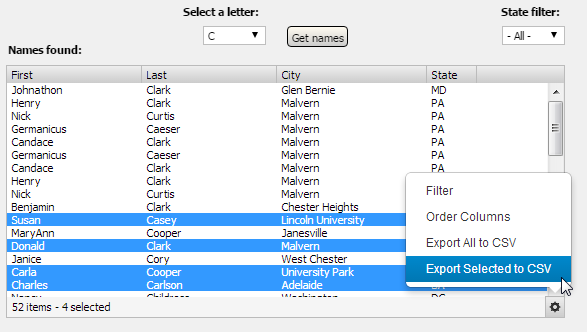
You can choose to export all or some of the results displayed in the list box to a CSV file on your local system. To export to CSV, click on the gear icon and choose Export All to CSV. If the DataBlock designer set up this list box so that you can select multiple rows using the Shift or Control keys and you have selected at least one row, you will also see an option to Export Selected to CSV.
In the Export Data dialog, you can choose which columns to include, reorder or rename columns, and configure various export options.
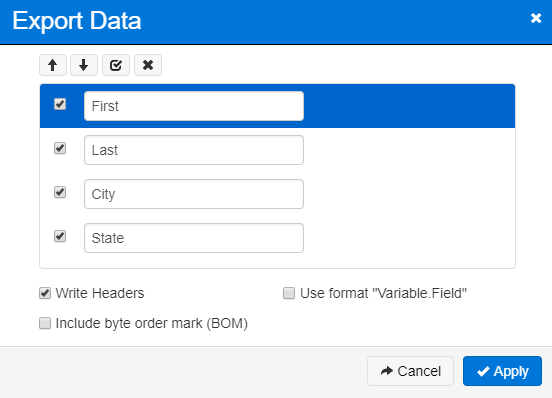
- Write Headers - Include a row containing the column names at the top of the file.
- Use format "Variable.Field" - Preface column headers with the name of the multi-column listbox object.
- Include byte order mark (BOM) - Some programs, such as Microsoft Excel, require a byte order mark in the file to render extended ASCII characters correctly. You should check this box if there may be foreign characters in the data and you will be opening the CSV file in such a program.
The exported CSV file will contain exactly the rows you specified, including any custom sorting or filters.
Importing a CSV File
DataBlock Designers may request a .csv file to be uploaded the next time the DataBlock is run. This is useful for supplementing a query with information found outside of a typical database. When this option is enabled, the user running the DataBlock will see this message:
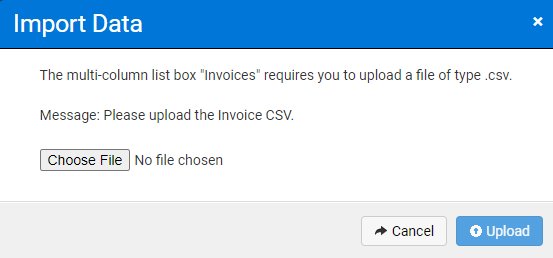
Select the Choose File button to browse for the requested .csv file. Once found, select "Upload" to continue.
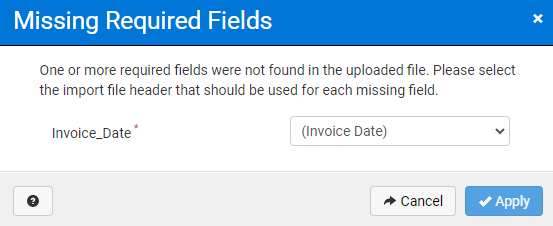
Missing Required Fields
When a CSV header is marked as required by the DataBlock Designer, but is missing from the prompted user's upload, the following message is produced:
